
Milk ‘N’ Cookies Icebox Cake Recipe
Introduction
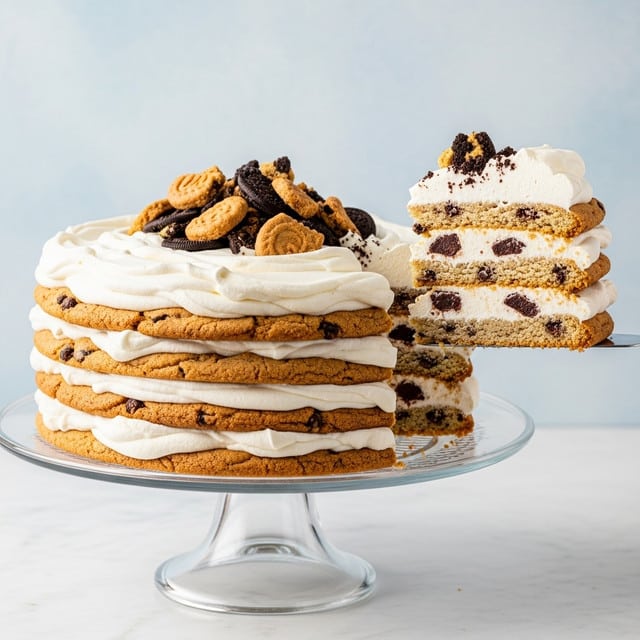
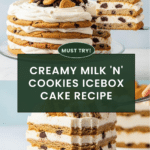
Milk ‘N’ Cookies Icebox Cake is a delightful and easy no-bake dessert that combines the crunchy texture of chocolate chip cookies with a fluffy, creamy filling. Perfect for when you want a sweet treat that’s impressive yet simple to prepare.
Ingredients
- 2 (13-oz.) boxes store-bought chocolate chip cookies
- 3 cups heavy cream
- 1 (8 oz) block cream cheese, softened
- 2 tablespoons powdered sugar
Instructions
- Step 1: Place 15 chocolate chip cookies inside a large resealable bag and crush them using a rolling pin. Transfer most of the crushed cookies into a large liquid measuring cup, reserving some for decorating later. Add the heavy cream to the measuring cup and let it sit for 10 minutes.
- Step 2: Pour the heavy cream over a strainer into a large bowl to separate it from the crushed cookies. Discard the strained cookie bits.
- Step 3: In another large bowl, add the softened cream cheese and beat it with a handheld electric mixer until fluffy, about 1 minute. Add the powdered sugar and continue beating until smooth. Pour in the cookie-infused cream and beat the mixture until soft peaks form.
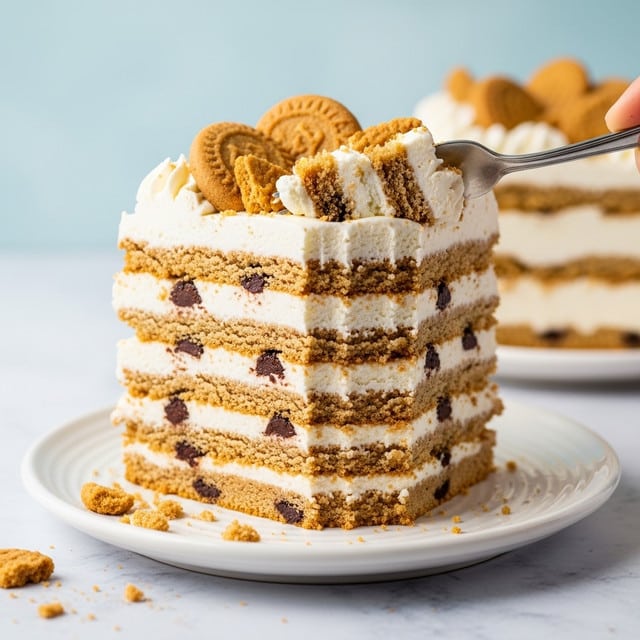
- Step 4: On a cake plate, spread a thin layer of the whipped cream mixture. Arrange 8 whole cookies side by side in a circle, then place 3 cookies in the center. Spread a layer of whipped cream on top, then add another layer of cookies, alternating so the cookies do not sit directly on top of those below. Repeat the layering until you have six layers, finishing with a final layer of whipped cream.
- Step 5: Sprinkle the reserved crushed cookies over the top. Wrap the cake loosely with plastic wrap and refrigerate for about 6 hours, or until very soft and set.
Tips & Variations
- For added flavor, try mixing a teaspoon of vanilla extract into the cream cheese mixture before beating.
- Use any favorite cookie variety, such as oatmeal or peanut butter, to customize the dessert.
- Serve chilled with a drizzle of chocolate syrup or a sprinkle of sea salt for an extra touch.
Storage
Store the icebox cake in the refrigerator, covered loosely with plastic wrap, for up to 3 days. To reheat, simply let it sit at room temperature for 10–15 minutes before serving to soften slightly, though it is best enjoyed chilled.
How to Serve
Serve this delicious recipe with your favorite sides.
FAQs
Can I use homemade cookies instead of store-bought?
Yes, homemade cookies work well and can add a personal touch, just make sure they are firm enough to hold up during layering.
What if I don’t have a handheld mixer?
You can use a stand mixer or even whisk by hand, but beating the cream cheese and cream mixture until soft peaks form may take more time and effort.
Print
Milk ‘N’ Cookies Icebox Cake Recipe
- Total Time: 6 hours 20 minutes
- Yield: 8 servings 1x
Description
Milk ‘N’ Cookies Icebox Cake is a luscious no-bake dessert layered with crunch from chocolate chip cookies and a fluffy, creamy filling made from whipped cream and cream cheese. This easy-to-make treat combines familiar flavors into a chilled, melt-in-your-mouth cake that’s perfect for impressing guests with minimal effort.
Ingredients
Cookies
- 2 (13-oz.) boxes store-bought chocolate chip cookies
Cream Filling
- 3 cups heavy cream
- 1 (8 oz) block cream cheese, softened
- 2 tablespoons powdered sugar
Instructions
- Crush Cookies and Infuse Cream: Place 15 cookies in a large resealable bag and crush them using a rolling pin. Transfer most of the crushed cookies to a large liquid measuring cup, reserving some for decoration. Add the heavy cream to the measuring cup and let it sit for 10 minutes to infuse flavor.
- Strain Cream: Pour the heavy cream through a strainer into a large bowl to remove the cookie bits, discarding the solids. This cookie-infused cream will add a hint of chocolate chip flavor to the filling.
- Prepare Cream Cheese Mixture: In another large bowl, beat the softened cream cheese with a handheld electric mixer for about 1 minute until fluffy. Add powdered sugar and beat until smooth. Then add the strained cookie-infused cream and continue beating until soft peaks form, creating a light and airy whipped cream mixture.
- Assemble the Cake: On a cake plate, spread a thin layer of the whipped cream mixture. Arrange 8 whole cookies side by side in a circle with 3 cookies in the center to form the first layer. Spread a layer of whipped cream over the cookies, then add another cookie layer, offsetting cookies to avoid stacking directly on one another. Repeat this layering process until you have six layers, finishing with a layer of whipped cream on top.
- Decorate and Chill: Sprinkle the reserved crushed cookies on top for decoration. Wrap the cake loosely with plastic wrap and refrigerate for approximately 6 hours or until very soft and set. This chilling step allows the cookies to soften and the flavors to meld beautifully.
Notes
- For best results, use cookies that can soften well without becoming too mushy.
- You can prepare this dessert a day ahead to save time and enhance flavor.
- Ensure the cream cheese is softened to room temperature for easy mixing and a smooth texture.
- If desired, garnish the top with chocolate shavings or a drizzle of chocolate syrup for extra indulgence.
- Use a sharp knife warmed in hot water to cut clean slices.
- Prep Time: 20 minutes
- Cook Time: 0 minutes
- Category: Dessert
- Method: No-Cook
- Cuisine: American
Keywords: icebox cake, chocolate chip cookies, no-bake dessert, creamy dessert, layered cake, cream cheese dessert


