
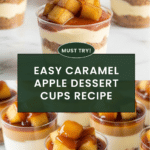
Caramel Apple Dessert Cups Recipe
Introduction
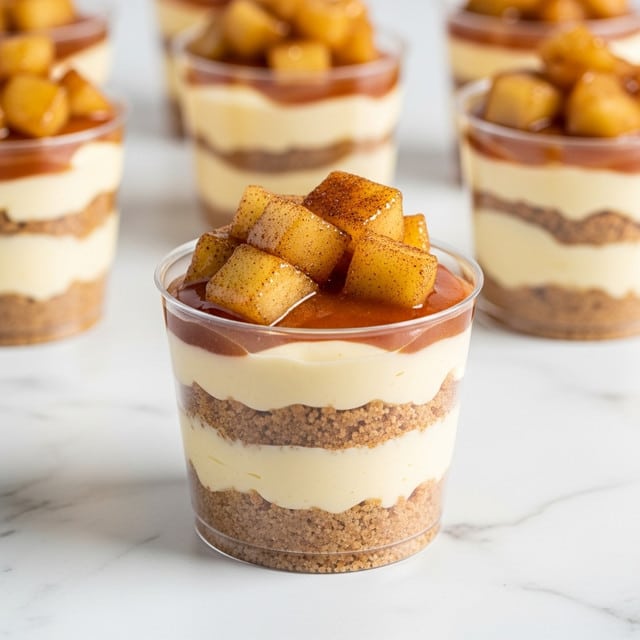
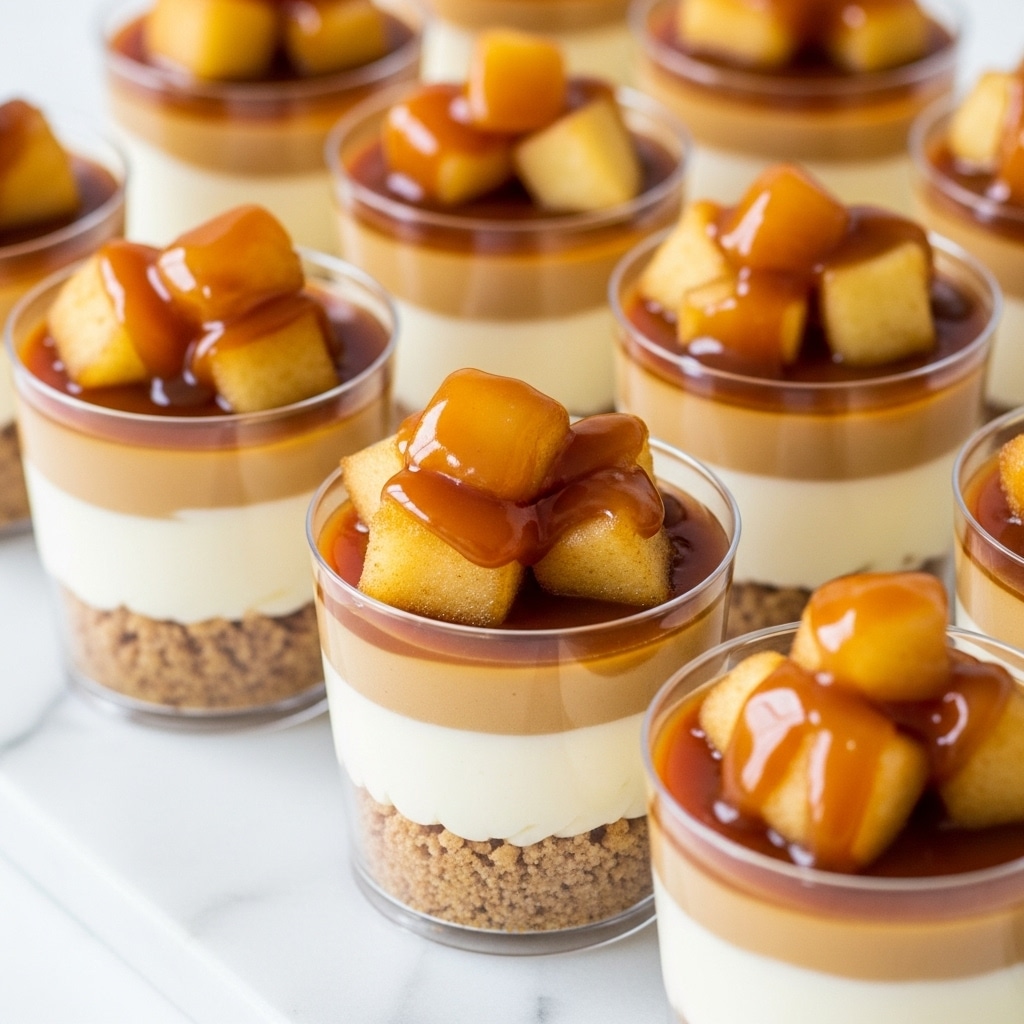
These Caramel Apple Dessert Cups are a delightful treat that combines tender cinnamon-spiced apples with creamy caramel mousse and a crunchy vanilla wafer crust. Perfect for individual servings, they offer a balanced mix of flavors and textures that everyone will love.
Ingredients
- 4 cups apples (peeled and chopped)
- ½ cup light brown sugar
- 1 tsp cinnamon
- 2 cups vanilla wafer crumbs
- ¼ cup salted or unsalted butter (melted)
- 1 pkg instant vanilla pudding mix (3.4 ounces)
- 1 cup milk
- ⅓ cup salted caramel sauce
- 1 ½ cups heavy cream
- Additional caramel sauce for garnish
Instructions
- Step 1: In a medium saucepan, combine peeled and chopped apples, brown sugar, and cinnamon. Stir and cook over medium heat until the apples are soft and the liquid thickens. Set aside to cool.
- Step 2: In a mixing bowl, combine vanilla wafer crumbs and melted butter. Stir until fully incorporated.
- Step 3: Portion vanilla wafer crumbs into 28 – 2 ounce plastic cups using a small cookie scoop. Use the back of one of the cups to press the crumbs down firmly to create the crust.
- Step 4: In a large mixing bowl, combine instant vanilla pudding mix and milk. Whisk to combine and chill for 5 minutes.
- Step 5: Add salted caramel sauce to the vanilla pudding mixture. Use an electric hand mixer on medium speed to mix the caramel into the pudding until smooth.
- Step 6: Pour in the heavy cream and whip with an electric hand mixer for 3-5 minutes until thick and creamy.
- Step 7: Transfer the caramel mousse mixture to a piping bag. Pipe the mousse into the plastic cups on top of the vanilla wafer crust.
- Step 8: Using a spoon, portion the cinnamon apples over the caramel mousse. Drizzle with additional caramel sauce if desired.
- Step 9: Seal the cups with lids and chill. Serve immediately or store in the refrigerator for 2 to 3 days.
Tips & Variations
- For extra crunch, add chopped toasted pecans or walnuts on top before serving.
- Use gluten-free vanilla wafers to make this dessert gluten-free.
- Try substituting the salted caramel sauce with regular caramel sauce for a sweeter finish.
- If you prefer a less sweet dessert, reduce the brown sugar slightly in the cooked apples.
Storage
Store the dessert cups sealed in the refrigerator for up to 2 to 3 days. They can be served chilled directly from the fridge. If the crust softens, you can briefly chill the cups uncovered to help it firm up before serving again.
How to Serve
Serve this delicious recipe with your favorite sides.
FAQs
Can I make these dessert cups ahead of time?
Yes, these cups can be prepared a day or two in advance and stored in the refrigerator. This allows the flavors to meld wonderfully, and it makes serving quick and easy.
What can I use instead of instant vanilla pudding mix?
If you don’t have instant pudding mix, you can make a homemade vanilla pudding using cornstarch, sugar, milk, and vanilla extract. However, keep in mind the texture might differ slightly from the instant mix version.
Print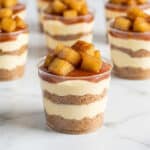
Caramel Apple Dessert Cups Recipe
- Total Time: 25 minutes
- Yield: 28 – 2 ounce dessert cups 1x
Description
Delight in these Caramel Apple Dessert Cups, a luscious combination of tender cinnamon-spiced apples, a buttery vanilla wafer crust, and creamy caramel-infused pudding mousse. Easy to prepare and perfect for fall gatherings or anytime you crave a sweet and comforting treat.
Ingredients
Apple Filling
- 4 cups apples, peeled and chopped
- ½ cup light brown sugar
- 1 tsp cinnamon
Crust
- 2 cups vanilla wafer crumbs
- ¼ cup salted or unsalted butter, melted
Caramel Pudding Mousse
- 1 package instant vanilla pudding mix (3.4 ounces)
- 1 cup milk
- ⅓ cup salted caramel sauce
- 1 ½ cups heavy cream
- Additional caramel sauce for garnish
Instructions
- Cook the Apple Filling: In a medium saucepan, combine peeled and chopped apples, light brown sugar, and cinnamon. Cook over medium heat, stirring occasionally, until the apples soften and the liquid thickens into a syrupy consistency. Remove from heat and set aside to cool.
- Prepare the Crust: In a mixing bowl, mix vanilla wafer crumbs with melted butter until fully incorporated, creating a crumbly, buttery mixture.
- Form the Crust in Cups: Scoop the vanilla wafer crumb mixture into 28 – 2-ounce plastic cups using a small cookie scoop. Press the crumbs firmly with the back of a plastic cup to form an even crust layer.
- Make the Vanilla Pudding: In a large bowl, whisk together the instant vanilla pudding mix and milk until combined. Chill the mixture for 5 minutes to let it begin setting.
- Add Caramel Sauce: Pour salted caramel sauce into the chilled pudding mixture. Using an electric hand mixer on medium speed, blend until the caramel is smooth and fully integrated.
- Whip the Heavy Cream: Add heavy cream to the pudding mixture and continue whipping with the electric mixer for 3-5 minutes until the mixture thickens and becomes creamy, forming a mousse consistency.
- Assemble the Dessert Cups: Transfer the caramel mousse into a large piping bag and pipe it evenly over the vanilla wafer crust in each cup.
- Add Apple Topping and Garnish: Spoon the cinnamon-spiced apple filling atop the caramel mousse in each cup. Drizzle additional caramel sauce over the apples for extra flavor and a beautiful finish.
- Chill and Serve: Seal the cups with lids and chill in the refrigerator. These dessert cups can be served immediately or stored for 2 to 3 days for best freshness and taste.
Notes
- For a stronger caramel flavor, use homemade salted caramel sauce or your favorite quality brand.
- If you prefer a crunchier texture, add chopped nuts such as pecans or walnuts atop the apples.
- These dessert cups are ideal for make-ahead entertaining and travel well for potlucks.
- Use gluten-free vanilla wafers for a gluten-free version.
- Store leftovers in the refrigerator tightly covered to maintain freshness.
- Prep Time: 15 minutes
- Cook Time: 10 minutes
- Category: Dessert
- Method: Stovetop
- Cuisine: American
Keywords: Caramel apple dessert, apple cinnamon dessert, vanilla wafer crust, caramel pudding mousse, fall dessert cups, no-bake dessert, easy dessert recipe