
Monster Oreo Balls Recipe
Introduction
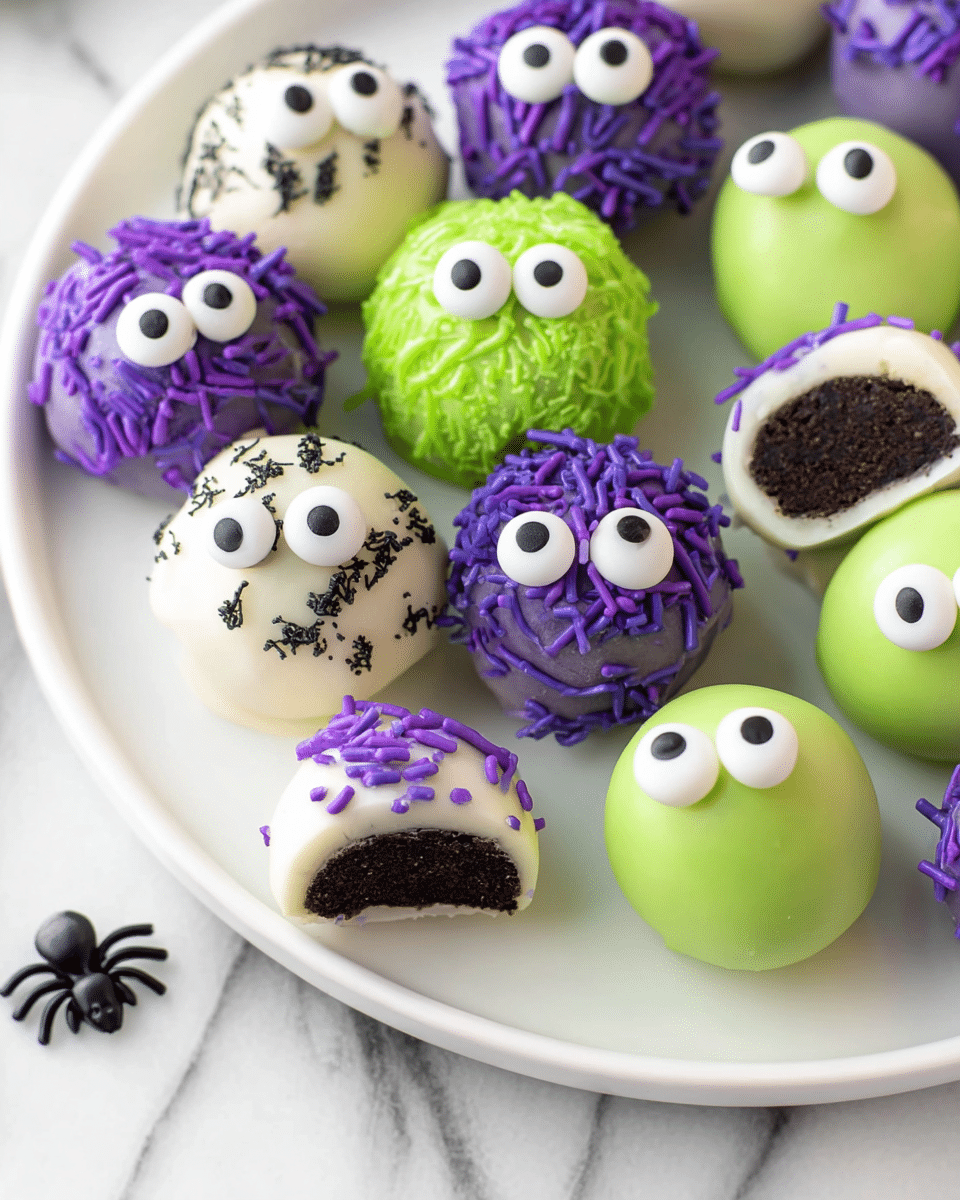
Monster Oreo Balls are a fun and spooky treat perfect for any party or Halloween celebration. These adorable little monsters combine rich Oreo flavor with creamy chocolate coating and playful candy eyes that make them irresistible to both kids and adults.
Ingredients
- 36 Oreos
- 8 ounces cream cheese (softened at room temperature)
- 1 teaspoon vanilla extract
- 2 cups white, light green, and purple melting wafers (about 2/3 cup each color)
- 3 tablespoons Crisco shortening
- Green, purple, and black long (not round) jimmies sprinkles
- Candy eyes in multiple sizes
Instructions
- Step 1: In a food processor, add the Oreos, breaking them apart slightly while adding, and crush until they turn into fine crumbs.
- Step 2: In a large mixing bowl, combine the Oreo crumbs, cream cheese, and vanilla extract. Mix with a handheld electric mixer or stand mixer for 1 to 2 minutes until fully combined and forming a dough-like mixture.
- Step 3: Using a 2-tablespoon cookie scoop, portion the dough and roll each portion into a smooth, even ball with your palms. Place the balls on a large cookie sheet lined with parchment paper.
- Step 4: Refrigerate the cookie sheet with the Oreo balls for 2 hours to firm up.
- Step 5: Near the end of chilling, prepare the melting wafers by working one color at a time. Place wafers in a microwave-safe bowl and heat at 50% power or defrost mode for 1 minute. Stir, add 1 tablespoon of Crisco, then microwave in 30-second bursts, stirring between each, until the mixture is smooth and silky with a dressing-like consistency.
- Step 6: Dip 6 to 7 Oreo balls into the melted chocolate using two forks or dipping tools, coating completely. Remove excess chocolate by scraping the forks or gently shaking the ball side to side. Place the coated balls back onto the parchment-lined sheet.
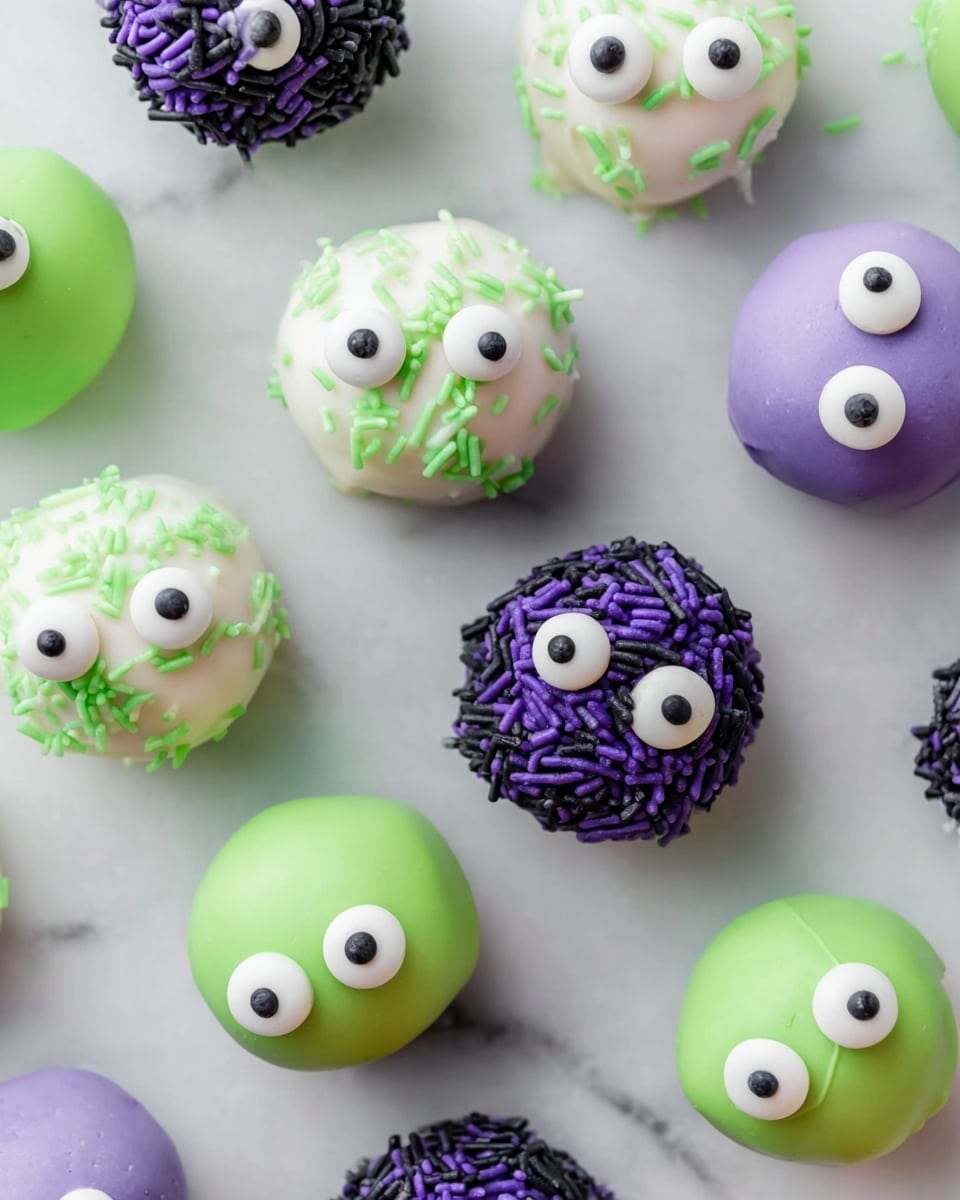
- Step 7: Immediately decorate each ball with candy eyes and the long jimmies sprinkles to create fun and spooky monster faces.
- Step 8: Repeat the melting, dipping, and decorating process for each color of melting wafers until all balls are covered.
- Step 9: Chill all decorated monster Oreo balls for another 30 minutes before serving to set the coating.
Tips & Variations
- Use room temperature cream cheese for easier mixing and smoother texture.
- Swap the cream cheese for a dairy-free alternative to make these treats vegan-friendly.
- Try different colored melting wafers or add edible glitter to make your monsters extra festive.
- If you don’t have Crisco, vegetable oil can be used, but use less to keep the coating firm.
Storage
Store the Monster Oreo Balls in an airtight container in the refrigerator for up to one week. For longer storage, freeze them for up to one month and thaw in the fridge overnight before serving. Reheat is not recommended, as the chocolate coating may soften or melt.
How to Serve
Serve this delicious recipe with your favorite sides.
FAQs
Can I make the Oreo balls ahead of time?
Yes, you can prepare the Oreo balls and refrigerate or freeze them before dipping and decorating. Just be sure to fully chill before coating to keep them firm and easy to work with.
What if I don’t have candy eyes?
You can get creative by using chocolate chips, mini marshmallows, or colored icing to create eyes and other monster features. The goal is to have fun with the decorations!
Print
Monster Oreo Balls Recipe
- Total Time: 2 hours 45 minutes
- Yield: Approximately 24–27 Oreo balls 1x
Description
Monster Oreo Balls are a fun and festive no-bake Halloween treat made by combining crushed Oreos with cream cheese, shaping them into balls, and coating them in colorful melted wafers. Decorated with candy eyes and sprinkles, these spooky treats are perfect for parties or a playful dessert.
Ingredients
Oreos Mixture
- 36 Oreos
- 8 ounces cream cheese, softened at room temperature
- 1 teaspoon vanilla extract
Melting Coating
- 2 cups white melting wafers
- 2 cups light green melting wafers
- 2 cups purple melting wafers
- 3 tablespoons Crisco shortening
Decorations
- Green, purple, and black long jimmy sprinkles
- Candy eyes (multiple sizes)
Instructions
- Crush Oreos: In a food processor, slightly break the Oreos apart and pulse until they are fine crumbs.
- Mix Ingredients: In a large bowl, combine the crushed Oreos, softened cream cheese, and vanilla extract. Use an electric hand mixer or stand mixer to blend for 1-2 minutes until a smooth, dough-like mixture forms.
- Shape Balls: Using a 2 tablespoon cookie scoop, scoop the mixture and roll each portion into a smooth, round ball with your hands. Place them on a parchment-lined cookie sheet.
- Chill Dough Balls: Refrigerate the cookie sheet with Oreo balls for 2 hours to firm up.
- Melt Wafers: Near the end of chilling, prepare melting wafers one color at a time: microwave wafers at 50% power or defrost mode for 1 minute, stir, add 1 tablespoon of Crisco shortening, and microwave in 30-second increments until smooth and silky.
- Dip Balls: Using two forks or dipping tools, dip 6-7 Oreo balls into the melted wafers, coating completely. Remove excess coating by scraping the forks or gently swinging the balls side to side, then place back on the cookie sheet.
- Decorate: Immediately add candy eyes and sprinkle the long green, purple, and black jimmy sprinkles on top to create spooky monster faces.
- Repeat Coating & Decorating: Repeat melting, dipping, and decorating steps for each color of melting wafers.
- Final Chill: Chill all decorated Oreo balls for another 30 minutes before serving to set the coating.
Notes
- Use room temperature cream cheese to ensure smooth mixing.
- Work with one melting wafer color at a time for best coating results.
- Add Crisco shortening to melting wafers to achieve a silky, smooth texture perfect for dipping.
- Store finished Monster Oreo Balls in the refrigerator to keep them firm.
- These treats are perfect for Halloween parties and kid-friendly gatherings.
- Prep Time: 15 minutes
- Cook Time: 0 minutes
- Category: Dessert
- Method: No-Cook
- Cuisine: American
Keywords: Oreos, cream cheese, Halloween treats, no-bake dessert, monster balls, candy eyes, melting wafers, party snacks


